Cartoon Nuclear Power Plant: A Practical Guide to 3D Printing Success
The intersection of educational utility and whimsical design is a rare find in the world of digital fabrication. The Cartoon Nuclear Power Plant STL file represents exactly this balance, offering a stylized take on industrial infrastructure that appeals to hobbyists, educators, and collectors alike. However, downloading a file labeled as "beginner-friendly" does not guarantee a flawless print. Many enthusiasts rush into printing complex geometries without understanding the specific mechanical and aesthetic requirements of the model. This oversight often leads to wasted filament, failed prints, and frustration.
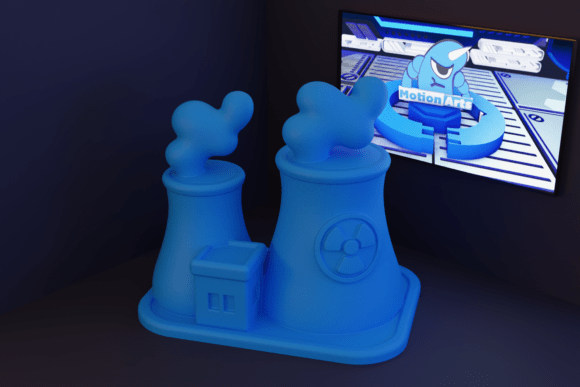
Understanding the nuances of this specific design is crucial. While the model features a fun, approachable aesthetic with its exaggerated cooling towers and solid structure, it still adheres to the physical laws of additive manufacturing. To get the most out of this AI-generated 3D design, you must look beyond the thumbnail image and evaluate the technical specifications, support requirements, and intended use cases. This guide will help you navigate common pitfalls and ensure your final print captures the intended charm and structural integrity.
Understanding the Design Intent and Limitations
Before slicing your file, it is essential to recognize what this model is and what it is not. The Cartoon Nuclear Power Plant is designed for visual appeal and thematic decor rather than strict engineering accuracy. The proportions are balanced for humor and stability, making it ideal for miniature collections or classroom demonstrations about energy sources. However, because it is an AI-generated design, the geometry may contain irregularities that standard CAD models do not.
A common mistake is assuming that "cartoon style" implies low geometric complexity. In reality, stylized curves and organic shapes can be more challenging to print than rigid, angular structures. The cooling towers, for instance, likely feature tapered walls that require precise layer adhesion. If you treat this model like a simple blocky print, you may encounter warping or layer shifting. Always inspect the mesh in your slicer software before committing to a print. Look for non-manifold edges or inverted normals, which are common artifacts in AI-generated STL files.
Common Mistakes in Printer Selection and Setup
One of the most frequent errors users make is mismatching the printer technology to the model’s requirements. The product description notes compatibility with both FDM (Fused Deposition Modeling) and resin printers. While this versatility is a selling point, each technology demands a different approach to achieve a "clean finish."
- FDM Printers: If you are using an FDM printer, the primary challenge is surface quality. The "fun look" of the cartoon plant relies on smooth curves. Using a nozzle that is too large (e.g., 0.6mm or 0.8mm) will result in visible stair-stepping on the cooling towers, detracting from the aesthetic. Stick to a 0.4mm nozzle for a balance of speed and detail.
- Resin Printers: Resin offers superior detail but introduces fragility. The "solid structure" mentioned in the description is relative. Resin prints can be brittle, especially at thin connection points. If you plan to handle the model frequently or use it in an educational setting with children, FDM might be the safer, more durable choice despite the lower resolution.
Another overlooked detail is the orientation of the model on the build plate. Printing the power plant upright might seem intuitive, but it often requires excessive supports inside the cooling towers, which are difficult to remove without damaging the interior walls. Consider rotating the model 45 degrees or printing it in separate parts if the STL allows, though this specific file appears to be a single-piece design. Always check the overhang angles in your slicer’s preview mode.
Navigating Support Structures and Removal
The description explicitly states that support is required. Ignoring this or underestimating the complexity of support removal is a recipe for disaster. For a model with stylized towers and potentially intricate base details, supports are not just a suggestion—they are a structural necessity.
Many beginners make the mistake of using default support settings. This often results in supports that are either too dense, leaving scars on the model’s surface, or too sparse, causing sagging on the overhangs. For a beginner-level project, it is advisable to use tree supports (if your slicer allows) as they tend to touch the model at fewer points and are easier to remove. Alternatively, manually place supports only where necessary, avoiding flat surfaces that will become visible display areas.
When removing supports, patience is key. Rushing this process can snap off delicate features of the cartoon plant. Use flush cutters to trim the bulk of the support material, then carefully sand the remaining nubs. Sanding is particularly important for this model because the "clean finish" is part of its appeal. A rough surface will break the illusion of the smooth, cartoonish design.
Material Choice and Post-Processing
Selecting the right material can significantly impact the final look of your Cartoon Nuclear Power Plant. PLA is the go-to choice for beginners due to its ease of use and low warping tendency. However, standard PLA can look dull. To enhance the "atomic energy" vibe, consider using silk PLA or color-changing filaments. These materials add a dynamic visual element that complements the playful nature of the design.
If you are using this model for educational purposes, durability might be a priority. In this case, PETG is a better option. It is more resistant to heat and impact, ensuring the model survives repeated handling. Keep in mind that PETG requires slightly higher printing temperatures and may ooze more, so adjust your retraction settings accordingly.
Post-processing is where the model truly comes to life. Painting a cartoon-style object allows for creative expression. Use acrylic paints to highlight the cooling towers and add humorous details like smoke clouds or warning signs. A primer coat is essential to hide layer lines and provide a uniform base for painting. This step transforms a simple plastic print into a polished piece of themed decor.
Evaluating the Model for Your Specific Needs
Before downloading, ask yourself how you intend to use the model. Is it for a desk ornament, a classroom prop, or part of a larger diorama? This decision influences your scaling and printing strategy. For a small desk ornament, high detail is crucial, favoring resin printing or fine-tuned FDM settings. For a classroom prop, size and durability take precedence, making larger-scale FDM printing with PETG the logical choice.
Also, consider the source of the file. Since this is an AI-generated 3D design, verify the file integrity. Check user reviews or comments if available on the platform where you found it. Look for feedback regarding printability and support placement. If no reviews exist, print a small test section or scale the model down to 50% for a trial run. This low-cost test can save you hours of failed printing time.
Final Thoughts on Adding Atomic Energy to Your Collection
The Cartoon Nuclear Power Plant offers a unique blend of humor and engineering, making it a standout addition to any 3D printing portfolio. By avoiding common mistakes related to printer selection, support management, and material choice, you can ensure a successful print. Remember that the goal is not just to produce an object, but to create a piece that communicates fun and creativity. Take the time to prepare your file, choose your materials wisely, and finish with care. The result will be a high-quality miniature that adds a dose of atomic energy and cartoon style to your collection, perfectly balancing the whimsical with the technical.